Fixing a leaky stop valve is a manageable DIY project that can prevent water damage and save you from costly repairs. Below is a comprehensive step-by-step guide to help you fix your leaking valve efficiently.
Tools and Materials You Will Need:
- Adjustable wrench
- Screwdriver
- Packing rope or Teflon tape
- Replacement washers (if needed)
- Pliers (optional)
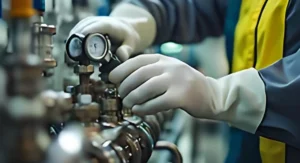
Step 1: Turn Off the Water Supply
Before beginning any repair, it’s crucial to take the necessary safety steps. Start by locating the main water supply connected to the valve you are working on. This is usually found near the water meter, often in the basement, utility room, or outside near the street. Once located, turn off the main water valve by rotating it clockwise until it’s completely closed. Doing this ensures that no water flows to the valve, preventing leaks or potential flooding as you proceed with the repair. Additionally, opening nearby faucets can help relieve any pressure in the system, further reducing the chance of residual water leakage. Taking these steps will not only make the repair process smoother but also protect your property from water damage.

Step 2: Open the Connected Faucet
Once the main water supply is turned off, open the faucet that the stop valve controls. This will release any remaining water and pressure from the pipes, ensuring that no excess water is left to interfere with your repair. Draining the system in this way makes the repair process cleaner and easier, allowing you to work without worrying about water spilling out unexpectedly. It also helps you assess the issue more accurately, as you can be sure the water is fully cut off before you begin disassembling or replacing parts.
Step 3: Remove the Valve Handle
After releasing the water pressure, take a screwdriver and carefully remove the screw that holds the valve handle in place. This screw is usually located at the center of the handle. Once the screw is out, gently pull the handle off to avoid damaging any parts. With the handle removed, you’ll have access to the valve stem, the component that controls the water flow through the valve. This step is essential for reaching the internal parts of the valve and inspecting or replacing any worn components, making it easier to continue with the repair.
Step 4: Loosen the Packing Nut
Once the valve handle is removed, take an adjustable wrench and carefully begin loosening the packing nut, which sits just behind the valve stem. Be gentle and deliberate when turning the wrench to avoid applying too much pressure. Over-tightening or forcing the nut can strip the threads or damage the valve, leading to further complications. Loosen the nut gradually, allowing you to access the valve stem for inspection or replacement. This careful approach ensures the integrity of the valve and reduces the risk of additional repairs being necessary.
Step 5: Replace the Packing Material
After loosening the packing nut and inspecting the valve stem, wrap new packing rope or Teflon tape tightly around the stem. Make sure to wrap it evenly and snugly, covering the area where the stem meets the packing nut to ensure a proper seal. The packing material acts as a barrier to prevent water from leaking around the valve stem, a common source of leaks. However, be cautious not to over-wrap or apply too much pressure, as this could make the valve difficult to operate. The goal is to create a firm but flexible seal that prevents leaks while allowing the valve to turn smoothly.
Step 6: Check and Replace the Washer (If Necessary)
If you notice that the washer at the top of the valve stem is worn or damaged, it’s crucial to replace it. The washer plays a vital role in creating a tight seal between the valve stem and the bonnet, preventing water from leaking through. To replace the washer, simply remove the old one by unscrewing or prying it off, depending on the design. Then, place the new washer in its position, ensuring it fits snugly against the stem. Make sure to choose a washer of the correct size and material for your valve. This simple replacement can drastically improve the valve’s sealing ability, preventing future leaks and extending the life of the valve.
Step 7: Reassemble the Valve
Once you’ve replaced the washer and completed any necessary adjustments, reattach the packing nut and handle. Start by threading the packing nut back onto the valve stem, making sure to tighten it evenly. Use your adjustable wrench to secure it, but avoid over-tightening, which could damage the valve or its components.
After the packing nut is properly tightened, reattach the valve handle by aligning it with the stem and securing it with the screw you removed earlier. Ensure the handle is firmly in place and operates smoothly. Once everything is reassembled, turn the main water supply back on and check for leaks around the valve and handle. If there are no leaks, your repair is complete and the valve should be functioning properly.
Step 8: Turn the Water Supply Back On
Once you’ve reattached the packing nut and handle, slowly turn the main water supply back on. Gradually open the valve to allow water to flow through the system and check the area around the valve for any signs of leakage. If you notice any additional leaks, you may need to adjust the packing nut. Tighten it slightly to see if that stops the leak, but be careful not to overtighten.
If tightening the packing nut doesn’t resolve the issue, double-check that the washer is properly seated and that there are no other components that might be causing the leak. Ensuring that all parts are correctly installed and secured will help prevent future leaks and ensure the valve operates smoothly.
Step 9: Test the Valve
After turning the main water supply back on and checking for leaks, open and close the valve a few times to ensure it operates smoothly. This action helps to verify that the valve is functioning correctly and that the repair has been successful. If you notice any stiffness or difficulty in operation, or if leaks persist, make any necessary adjustments. Repeat this process as needed until you are confident that the valve is working properly and is free of leaks. This step ensures that the repair is complete and the valve is reliable for continued use.
Preventive Tips for Future Leaks
To help prevent future leaks and maintain your valve in good condition, consider these preventive tips:
1. Regular Inspection: Periodically check your valves and other plumbing components for signs of wear, corrosion, or leaks. Early detection can prevent major issues.
2. Proper Maintenance: Clean and lubricate valve components as needed to ensure smooth operation. Follow manufacturer recommendations for maintenance routines.
3. Avoid Over-Tightening: When working on valves, avoid over-tightening packing nuts or other components, as this can damage the valve or cause leaks.
4. Use Quality Parts: Always use high-quality replacement parts, such as washers and packing materials, to ensure a proper seal and long-lasting performance.
5. Keep Valves Exercised: Regularly open and close valves to keep the moving parts from becoming stuck or seizing up. This also helps in detecting any issues before they become serious problems.
6. Proper Installation: Ensure that all components are installed correctly and according to the manufacturer’s specifications. Incorrect installation can lead to leaks or other issues.
7. Water Pressure: Maintain a balanced water pressure in your system. Excessively high pressure can strain valves and other plumbing components, leading to leaks.
8. Temperature Control: Avoid exposing valves to extreme temperatures, which can cause materials to expand or contract and potentially lead to leaks.
By following these tips, you can help extend the life of your valves and reduce the likelihood of future leaks.